Saturday, September 18, 2010

Sharing a "Happy Accident"


About a week ago I began a crazy search online for a very old granny square block pattern with nothing but an old black and white photo from the later 1940's to base my search on. Well that, and visual memory of of an afghan I have not seen in 1989. It was an afghan that had been in my husbands family for many, many years and has traveled off to another line in the family. Such is life. I wanted to try and reproduce the afghan design but try as I might, I have not been able to find the exact pattern anywhere though there are many internet friends out there keeping a keen eye out for me. In the meantime I decided to try and reproduce the design myself but again, with only the black and while image to go by, this became a futile task. Or so I thought. While I did not reproduce that beautiful design that I sought after, I instead created my own design that came about quite nice accidentally so to re-coin the saying of the late painter Bob Ross, I am calling this design "The Happy Accident." I hope you find it to be as pleasing of a design as I have and I am including my directions below with photos, many, many out of focus bad photography photos but hoping they can help in some way. It was quite hard to take the photos one handed while holding the work with the other hand, lol. One of these days I will re-shoot them when I can get one of my guys to sit by me for an afternoon and patiently take the photos for me, lol.

"The Happy Accident" block

Supplies:
For an 8.75 inch block  Size "H" hook.  (I did try one with a size "K" and it was much looser and came to be a perfect size 10 inch block I tried "I" as well and ended up with same size as the "H" but didn't look as nice.)
6 different colors of size medium worsted weight yarn. I used Red Heart Super Saver acrylic yarn.
My colors in order were: 1. lt. purple 2. red 3. green 4. dk. yellow  5 purple and 6 black
1 yarn needle and scissors.

Update:  About a week or two ago I decided to play around with hook sizes and I found that using a size "F" hook produced a perfect size 7 inch square. 

Abbreviations:
Slip Stitch  SS
Single Crochet  SC
Half Double Crochet  HDC
Double Crochet  DC
Treble Crochet  TR
Yarn Over  YO

Beginning and ending repeat symbols used:  * # %

You will be working in color rounds in this pattern.

1. Beginning  with lt. purple, chain 4 and join with a SS.
Chain 1 and work 7 SC. Join through the 1st SC with a SS.

Work beginning puff stitch as follows:  Chain 3, YO and work through same SC as the SS join and base of chain 3. Hook yarn and pull through the SC. You now have 3 loops on hook. Hook the yarn and draw through all three loops. Chain 1 to secure beginning puff stitch. Chain 1 once more.  See photo below.


Puff Stitch:
YO and work through the next SC. 3 loops on hook. YO again and work through the same SC. 5 loops on hook. Hook yarn and draw through all 5 loops. Chain 1 to secure puff stitch. PUFF STITCH made.
Chain 2 (this will form corner) See photo below. PLEASE NOTE: TYPO IN PHOTO SHOULD READ THROUGH ALL 5 LOOPS ON HOOK!


*Work puff stitch through the next SC. Chain 1. Work puff stitch through next SC. Chain 2. Repeat from * 2 more times and join to top of chain 3 of beginning puff stitch with a SS. Fasten off and use yarn needle to work loose ends in. Your piece should look like photos below.


Update: Note, an alternative method to get thicker puff stitch is to be more traditional and continue adding more yarn overs until you have made 5 yarn overs and have 11 loops on the hook. Draw through all of them.

2. Next color Red.


Attach red in any chain 2 space and chain 3. This chain 3 counts as Beginning DC. Work a DC through the chain 2 space and chain 1. Work TR, chain 1, TR, Chain 1, and 2 dc. Chain 2. In next corner work *2DC, chain1, TR, chain1, TR, chain 1, 2DC, chain 2. Repeat from * 2 times more. Join the last chain 2 into top of the Beginning DC with a SS and fasten off. Work ends in. See photo below of finished round.


3. Attach next color, green, in any chain 2 space. Chain 1(counts as beginning SC).
I hope I can explain this next part well enough for you. You will now reach down to work a DC through the chain 1 space of the Lt. purple puff stitch round 1. You are working over the red and lt. purple chains encasing them. Study my photos below for visual aid.


Work a 2nd DC in same way. Work 1 SC through the red chain 2 space only. Study photos below.

*Chain 1, work 3DC in next chain 1 space, chain 1. Work 1DC, chain1, 1DC in the chain 1 space between the TR of red round. Chain 1, work 3DC in next chain 1 space. # Chain 1, work SC in next red chain 2 space. Reach down to Lt. purple chain 1 space and work 2DC as you did prior. Work 1SC through the red chain 2 space. % Your piece should resemble the back and front photos below.


Repeat from * to % 2 times and from * to # once. Chain 1 and join with a SS. Fasten off and work ends in.
Your piece should look like the photos below.


4. Attach dk. yellow through chain 1 space between a SC and 3DC as in photo below.

Chain 3 (counts as 1st DC) *DC through each of the next 3DC of green round. 1DC through chain 1 space. Work 2TR, chain 1, 2TR through the corner chain 1 space of green round. Work 1DC through chain 1 space and 3 more DC across tops of DC of green ground. DC through through chain 1 space. # Chain 2, work 1DC through next chain 1 space. % See photo below.

Repeat from * to % 2 times and from * to # once. Chain 2 and join with a SS to top of Beginning chain 3. Fasten off and work in ends.

You finished round should look like photo below.


5. Attach purple at chain 2 space on side of the block. Chain 1 (counts as 1 SC) Work 2DC over the dk. yellow and into the tops of the 2 DC of the green round. (same method as you worked the green over the red and lt purple in round 3) Work 1SC over the dk. yellow chain 2 space. Work SC across to corner chain 1 space. Work 3SC in corner. See photos below.

Sc across to chain 2 space. 1SC over dk. yellow chain 2 space, 2DC over dk. yellow and into the 2DC of green round below. Work 1SC over dk. yellow chain 2 space. SC across to corner and work 3SC in corner chain 1 space. Continue in this way around and join to beginning chain 1 with a SS. Fasten off and work in ends.

6. Attach last color black in any corner. Chain 1 and 2SC in corner. *5SC across, 2HDC, 4DC, 2HDC, 5SC to corner %  3SC in corner. # 
Repeat from * to # 2 times and from * to % 1 time. Join with a SS. Chain 1, 2SC in corner, SC across to next corner. 3SC in the corner. Repeat around and join with a SS to beginning chain 1. Fasten off. Work in loose ends. Block is finished.


©Copyright 2010 Andrea C. Heslin

Tuesday, August 31, 2010

Crochet for Pine Ridge Reservation


This has been a busy few weeks with the hook flying so to speak.  I am working on a care package of items to go out hopefully soon to the Pine Ridge Reservation of South Dakota. I still have space in my box for a few more items so I need to get back to work. I have found so many free patterns on the internet that just beg to be used and what better way then to use them to help another person. There are at least a few clothing drives each year for the reservation where winters are harsh and income is severely lacking. It is my hope that someone out there encountering my blog will see this post and will decide to take a stand and aid these people as I and many others working with the "Friends of Pine Ridge Reservation" are doing.  You can learn how you too can help by clicking on this link. Clothing and Winter Gear Donation Drive for the Community of Red Shirt

On a much sadder note, the reservation is suffering with the loss of life from this summer. Over the course of seven weeks there were seven suicides among it's people. I have been told the oldest was age 30 and the youngest was only a 12 year old child. For those  of you who are people of faith I ask that you keep those families held up in prayer.

Friday, August 20, 2010

Just another update

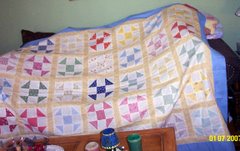
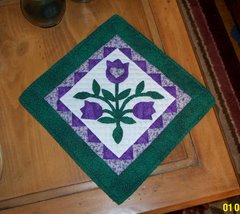
I thought I would try and do a quick update. It has been a busy two weeks. Lots of different projects were worked on. The first item I want to share with you though is a long term project I have been working on since 1999. I started this quilt using Moda Marbles in the sashing and Oregon Trail II fabrics collection having fallen in love with this color scheme. The problem as to why this is such a slow moving project (11 years into it) is that I made the blocks 6 inches and each block has 24 parts to it. I will never do this on a small scale block ever again, lol. It is turning out lovely but it does take some time and patience to sew together each block. I think I have enough blocks made over the summer that I can finally add one more row.

"Clay's Choice"


I also recently made a crochet lace edging and have added this to an old tea towel I sewed a few years ago.  The lace pattern came from the book "Our Best Thread Crochet" By Leisure Arts Leaflet 2889 Copyright 1996. I really love this book.

The last item I am including in today's update was a lot of fun for me. I saw some water-bottle totes photos and thought to myself, I bet I can design a pattern for one. So that is exactly what I did. I sat down with hook, yarn and pencil and paper and I created my first pattern.  I really love it too. After I made the first one, the brown one in Red Heart super saver acrylic yarn, I made a second one with the Peaches and Cream cotton yarn in shades of cream and blue. I am sharing not only the photos of the drink totes I made but I am sharing the pattern I designed for them. I hope you will be able to follow it since I have never written out a crochet pattern before. I would appreciate any feedback regarding issues or ease is using the pattern.

"Ann's Nifty Drink Totes"


Pattern:
Supplies: Red Heart Super Saver Acrylic worsted weight or Peaches and Cream Cotton
Size I crochet hook

Abbreviations:
Slip Stitch  SS
Single Crochet  SC
Double Crochet  DC
Treble Crochet  TR
Beginning Cluster  BC  = chain 3 and two TR into same stitch of previous row.
Treble Cluster  TRC = 3 TR into same stitch of previous row


Beginning round: Chain 5and join in 5th chain form hook with a slip stitch (SS) forming a ring.

Round 1: Chain 3. Double Crochet (DC) 15 times into the chain 5 ring.
Round 2: Chain 2. Single Crochet (SC) into the first DC of previous round. 2 SC into next DC. Repeat pattern of 1SC into DC and 2 SC into next DC all around. Join to beginning of round with a SS.
Round 3: Chain 2. Work this round as a pattern of SC, SC, then 2SC in into next SC so it will be SC, SC, 2SC repeated all around.  Join to beg of round with a SS.
Round 4: Chain 2. SC through the BACK LOOPS only all the way around. Join with a SS. This will begin to cup shape the sides of your piece.
Round 5: Chain 2. Sc into each SC all around. Join with a SS.
Round 6: Repeat round 5.
Round 7: Chain 2. SC in the first 4 SC of previous round. Work a decrease in the next two SC of the previous round. Repeat this pattern of 4 SC and one Decrease all around. Join with a SS.
Round 8: Chain 2. SC in each SC around. Join with a SS.
Round 9: Repeat round 8.
Round 10: Work Beginning Cluster (BC){ chain 3 and two TR} into first SC or previous row. Chain 1 and skip the next 2 SC of previous row and work a Treble Cluster (TRC) {3 treble crochet) into next SC of the previous row. Repeat pattern of Chain 1, skip 2 SC and make TRC all around ending with a chain 1 and join with a SS into the top of the BC with a SS. You will have 10 clusters in total from this round counting the BC.
Rounds 11: SS into the first chain 1 space of previous row. Work BC into this chain 1 space. *Chain 1. Work TRC into next chain 1 space of previous row.  Repeat from * around and end with a Chain 1 and SS to join. 10 Clusters in total.
Round 12: Repeat round 11. 10 clusters in total.
Round 13: Chain 2. Work two SC into the first chain a space of previous round. Work 1 Sc into top of cluster from previous round. Repeat this pattern around and join with a SS.
Round 14: SC in each SC of previous round. Join with a SS.
Round 15:  Forming the drawstring row. Chain 4. Skip 1SC and DC in the next SC of previous row. Now work pattern of Chain 1, skip 1SC and make 1DC all around. Join with a SC to the beginning chain 4.
Round 16: Chain 2. Work 2SC in first chain 1 space and in each chain 1 space around. Join with a SS.
Round 17: Chain 2. SC in each SC of previous round. Join with a SS.

Beginning straps

Row 1: Chain 2. SC in the next 3 SC of ROUND 17.
Row 2: Chain 2. Turn and work SC across 3 SC of row 1. You are now starting to make short rows to form the shoulder strap.
REPEAT row 2 until the strap measures 46 inches.
Be very careful not to twist the strap when you begin to attach it. Attach the strap to the other side of drink tote bag using a single crochet stitch and ties off. Weave ends into the piece.

Drawstring Chain 70 and work slips stitches along the chain back to the start and tie a knot. Cut 1/4 inch from knot. Weave the drawstring through the DC drawstring row. This will help secure the bag around the neck of your drink bottles.

Enjoy!

Ann Heslin


©Copyright 2010 Andrea C. Heslin


Friday, August 6, 2010

A Blues Melody.....


I really love this afghan! Rarely do I say anything like this about my own work but in this case it really is true. I have loved every stitch I put into this. I made this afghan for my 18 year old son, Jared. It is a reward for his attempts over the past 4 to 6 months of trying to keep his room tidy on his own initiative. He has made so many changes in his maturity of late. For those people who aren't aware, Jared is one of the many that have been diagnosed to fall in the PDD Autism spectrum. When I was first told of his Autism, I was told he would never read, write or do even simple math calculations oh and that he had no consciousness to him. Jared has consistently proved just how wrong that statement was. Not only can he do all those things, but he does them extremely well and is a very bright, verbal, creative and compassionate young man that also happens to be fully main streamed in school and an honor student.  Anyhow, Jared's new found love for keeping his room tidy has greatly impressed me with his moving maturity in the right direction. So since he is making this effort, I felt it would be good to make him something that would be just for him and enhance his room, his personal space. This blues themed color selection is perfect for him and matches the colors of his room perfectly. Jared absolutely loves music of all types and to me the colors moving up and down in value made me think of music notes dancing up and down the scale something which Jared immediately could see when he first saw me working on this afghan. The entire pieces is worked using the half double crochet stitch using a size "N" hook and each color was worked in rows of 6. I added in some white and amethyst as separators for the color repeats. I am not a huge fan of fringe but Jared asked me several times to add the fringe to it and I have to say once I added it, I decided I liked it. I hope you enjoy this afghan as much as we do.

Monday, July 26, 2010

3D Rose Afghan

This was a fun project! Each rose took me about an hour to crochet but was well worth the time investment. This is the first time I have tried to crochet anything on this scale. I finished it a few weeks ago and apologize for not posting sooner. I have already started 3 new crochet afghans. I guess I am in crochet mode but hope to get in some work on my cross-stitch projects soon.


This goofy dog of mine could not resist posing for the photo. The hard part was keeping him off the afghan!

The roses were created first and the green yarn was attached to the back of the rose. The green granny square background was formed from the back with double crochet stitch and bordered in white yarn with a row of single crochet stitching. Each white portion was also made with double crochet stitching to form solid granny squares and bordered with a row of single crochet then all the squares were sewn together. Once all the blocks were together, I used 2 rows of double crochet in green around the entire afghan which I then followed with 5 rows of a cream white. I finished this afghan with a row of green using the single crochet stitch.

Tuesday, March 9, 2010

A Stoney Creek Jungle Babies design

Isn't he darling! I just love him. I stitched him up and mailed him off to take part in a crib quilt being produced by the Krafters Korner Charity Quilt Yahoo group. We are working on quilts to donate to "Grandma's House" which is a temporary home for infants, toddlers and their young mothers who have no place else to live. A very worthy cause in my opinion. Thank you Mary for bringing this need to attention.

Saturday, March 6, 2010

Pine Ridge Reservation

For some time now I have wanted to write something to bring attention to this Native American Reservation. Words always fail me. I am not sure where to begin to describe what to me seems like a nearly modern day holocaust right here in America. I always thought and stupidly so that the Native Americans that are living on reservations were being well cared for by our government. I could not have been more wrong!! I knew we have poverty in our country but never ever would I dream it to be on such a scale as what these beautiful Native Americans are experiencing on the Pine Ridge Reservation. The teenage suicide rate on the res is the highest in our entire country! The average life expectancy is only to the age of 50! But you do not have to take my words alone for this information. Please follow the links and read for yourself the facts.

Native Village

Wikipedia

If you don't mind taking a few more moments of time, watch the videos on you tube and see first hand and hear the Oglala speak. Please be sure to pause my music choice player on my blog site before you click on the following links.

video 1
video 2
video 3
video 4

After learning the facts, I became compelled to do what I can to help. I am asking you that if you feel as compelled as I was to please get in touch with the "Friends of Pine Ridge Reservation and learn what you too can do to help.

Friends of Pine Ridge Reservation


Thank you,
Ann

Friday, March 5, 2010

Vintage Rose Granny Square Potholder


Happy, happy Friday! 
This week has seemed to have lasted forever. I have been rather busy over this entire past month of February and now we are into March. I wonder if it will hold true of March to come in like a lamb and exit like a lion. I hope we find ourselves in full spring by the end of the month. I am also a tad nervous about this March. The last week of March will make it a year since my sons and I nearly lost my husband from Congestive Heart failure. I am praying this this March will go far smoother. Joe seems to be doing quite well so I am feeling rather confident that we will certainly be celebrating his one year marker since being revived . I am also hoping that I will soon be finding more relief for my own health issues. I am one of the many millions that suffer from Fibromyalgia Syndrome. The doctor I saw last weekend was telling me that it is one of the least understood health conditions being experienced today. He was saying how each person experiences it differently, some mildly and others quite severely. At the moment, I am in that later category unfortunately. I have resisted taking medication for it because I was initially placed on Vioxx and we all know what happened to people on that nasty drug. It would seem though that I am reaching the point where I can no longer refuse medication and will be seeking out the best informed solution I can over the next few months. I really need to get mobile again! So anyhow, to keep from loosing my mind, lol, I keep myself busy with my needle projects. Although lately there have been times where the pain was even too much for me to do very much of that as well. Anyhow, today I want to share with you a longing fulfilled. It is this pretty little rose granny square crochet potholder. My husband and I had inherited several of these in a different color combination from my mother-in-law and I loved them. I just thought she was so cleaver! However over the years they vanished from our home. Some were lost in a basement flood that destroyed all the laundry I had in the basement ready to be washed  and others just seem to sprout legs and leave the house. We lost all but one potholder she made and I have always wanted to find a pattern and make more. Well, I got so excited a few weeks ago because someone posted the link to a website with the instructions to make the rose granny square. The pattern for this can be found here: Potholderlady It will take a few moment for the page to load the pdf file for it so please be patient. The green that I used is home dyed. I could not find a good green in the store so I just figured, hey why not use some of my white and just give it a dye bath. I really like the shade of green that I got from this. I have just enough left to make one more potholder. I hope to find the time in the next week or so to do that. In addition to making this crochet rose granny potholder, I have been busy crocheting dishcloths and I made two very large thick potholders from worsted weight yarn using another vintage crochet pattern. I just love them. They are large but wok well. And unfortunately, I have no clue where the pattern came from.


I hope to have more updates for you within the next few days as I have several projects that are very close to be finished and I look forward in sharing them with you. 

Saturday, February 13, 2010

A cross-stitching update


I managed to get in some more stitching on this piece of my Great-grandparents 1899 wedding photo. I still need to fix Grandpa Lou's ear but I will get to that eventually. My main goal was just to get back to some stitching. I rather enjoyed working on his suit. It was just the thing I needed to get me motivated to start cross-stitching again.

I also returned to another of my stitching projects that I started over the summer. I was feeling the need to work on something simpler that would stitch up more quickly. So this old Cricket Collection piece of the Lion and the Lamb was screaming at me to be worked on.


I am making rather good progress. Two days ago all I had was the frame border. I felt quite cleaver when it came to the lambs wool. I used to design and stitch needlepoint for a local shop and still have some Appleton's wool left over in my stash and found the perfect white and oyster colors which gave the lamb a fuzzy woolly effect. It is a shame that it just does not show up well in photograph. It is my hope to work more on this piece tonight after I cook dinner. I look forward to a nice relaxing evening of stitching.

Valentine's Exchange

I am not sure how many of you are familiar with doing swap exchanges through the mail so let me give you a little background. This is a popular activity among hobbiests in the online Yahoo Groups. A theme is chosen, people sign up and names are assigned and a deadline is announced. It really is a lot of fun when they work. I have been partaking in Group exchanges for about 5 or 6 years now and in all that time I have only been burned once when my exchange partner did not follow through. I recently joined in on my first exchange in the Krafter'sKorner group having not participated in one with them before. This was the first time I was in a cross-stitch type of exchange. I have mostly been involved with sewing and scrapbooking exchanges in my past. If you have heard of exchanges and never tried them, I encourage you to give it a try. They are a lot of fun. It is always nice getting a surprise in the mail. You never really know what your partner will send you. Sure you know the theme, but that actual package you get is another story. Well I received my first exchange packaged and I am posting a photo here on this blog. I got some nice goodies. I received a printed pattern for a Valentine's Elephant with the floss and fabric to make it (this will be made into a pillow) a bookmark fabric piece with a pattern on the back of it and I received a blank card with an oval cut from it for making a cross-stitch design card. All in all I was pleased with what I received. Thank you "Grandma Dee."


Tuesday, January 12, 2010

My first finish for 2010!


This is actually an old project I started two years ago and forgot about thus turning it into a UFO. I am not talking about aliens from outer space though sometimes I wonder about some of these projects I have. I realize that the non-crafty friends of mine that may have just been sent to this blog per my request may not have the slightest clue about some of these little crafty terms we crafters and hobbiest often use. In craft speak a UFO = UnFinished Objects which we eventually find our way back to working on and turn them into WIPs = Works In Progress. I found this crochet afghan blanket last December in the forgotten state of UFO and it quickly became a WIP which I found to be a rather enjoyable project to work on. I had forgotten just how much I actually enjoy the process of crochet. I am pleased with the finished piece and as you can see so are the pets. LOL, if you spread it, they will come and hop on top of it. The dog is Mr. Frodo and the little white feline is our youngest cat Zelda the zany. She is so much fun and has quite the sense of humor about her. I rescued her from a cemetery as a wee little kitten that still needed lots of help. She was deathly ill and we had to buy special kitten formula to feed to her. I wasn't too sure she would survive but the plan was to get her healthy and find her a good home. Well here she is four years later and I guess we became her good home, lol. She follows me everywhere in this house! As soon as I spread this afghan out to get a good look at it and photos, both the dog and Zelda immediately hopped up and planted themselves. This afghan is now in my oldest son's collection in his room. He seemed to be rather pleased with it.


Tuesday, December 15, 2009

Finished socks for my oldest son, A.J.


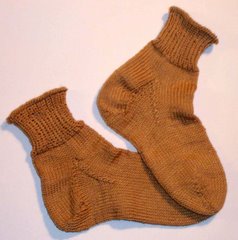
Well after frogging (ripping out) the first sock twice I finally managed to get the size adjusted to fit my son in the way he likes his socks to fit. Yes, I know they look a bit baggy around his toes, this is how he wears his socks. *Shakes head* He and I both had a good laugh though when noting just how big the feet look but after all this fellow does wear a size 13 shoe so of course the feet will look big, lol. Most especially since his feet ARE BIG! But as my grandfather would say, he is standing on a good strong foundation. Overall he seemed rather happy with the new socks and said they feel much better then the store bought ones so I am well pleased. Trust me, if he didn't like them he would tell me without thinking twice about my feelings in the matter. :)


Monday, December 14, 2009

Here is a little something I just finished.


I started to make this little dolly dress and bloomers a few years back when I had a booth in a local craft mall selling doll clothing. The store owners went Chapter 11 so I pulled out and still had a lot of doll stuff cut and ready to sew but have been storing it every since. I figure now is a good time to get back to sewing them up only I am going to save them to gift to my great niece for her birthday in the spring. This is the first time I have used my sewing machine in over 6 months. It felt good to be sewing again!

Tuesday, December 8, 2009

Warm winter socks


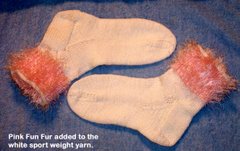
It must be winter time because the knitting needles and yarn are screaming out to me. I found this lovely yarn just a few weeks ago on Thanksgiving and had to get it for some cozy warm winter socks. I love it. They are so soft and keep my feet toasty. Yep, I already wore them and have had them in the wash. They came out great. It feels good to be knitting again! I used the "Magic Loop" method to knit them and did my own basic sock pattern of a 64 cast on working a 2k, 2p rib for 6 inches for a fold over cuff though they don't have to be folded over. After I finished the ribbing I reduced from 64 to 48 by doing a k2, k2tog for one row then knitted 10 rows straight stockinette stitch. I worked my heel over 24 stitches of row 1: slip 1, k1 and row 2 slip 1 perlwise and perl across for my desired heel length and worked the traditional sock method of turning the heel, working the instep by picking up 16 stitches on each side of my heel flap and working in alternating rows of reducing a stitch on each side of the foot and knitting without reducing until my stitches were reduced to 48 stitches on the needle then I worked straight knitting stockinette until my desired foot length to the start of the toes then I worked alternate reduction rounds just as before but reduced 2 stitches on each side of the foot for the toe shaping until I was down to 8 stitches and closed the toes using kitchner's ( I am sure I did not spell that right) technique. I am really pleased with how they turned out.

Adventures in Chaos and a finished hat


Hmm chaos and yet a finished item, how can that equate? Believe it or not it worked. Ah the beginning..... The search for the lost cord and no I am not referring The Moody Blues album. I am speaking of a lost sewing machine cord. Last spring hubby was in the hospital in dire straights and I gave orders to my sons just after Joe was released to help tidy the house. Well, my dining room was in sewing chaos and stuff got stuffed into containers and carted upstairs. So I have been assuming for a number of months that my sewing machine cord went upstairs in one of those containers. After I all, I have a clear memory of seeing a cord in one of the tubs and the cord to my Viking Designer 1 was in fact not with the machine so for me it only made sense that this had to be the cord. I sent the younger son after the containers one at a time hauling them downstairs for me to dig through them in better lighting. In them I found all sorts of goodies including half of my knitting supplies and a hat I started to knit two and a half years ago when I broke my foot. The hat was nearly finished yet I had managed to stuff it in one of these tubs and it was forgotten about until the search for the cord. I did located the cord I had remembered about in a tub and assumed it was my sewing machine cord. Well, since I had found that hat I decided to focus on knitting the hat instead of sewing so my machine set out on the dining room table waiting for me another 2 weeks before I decided to plug it in. However, the cord was not the correct cord. Good news, I have found the missing cord for my CD Player that I lost last spring, lol! Argh!!! Where was my sewing machine cord? Oh did I mention all this chaos was going on while I was fighting with swine flu?! My younger son and I spent two hours going through more boxes and containers yet we found no cord. I finally went in that room where I store everything and tore through it all like a bull in a china cabinet. Still no cord! I was getting depressed and figured I would have to contact Viking headquarters to see about ordering a new cord. My son commented that he just could not imagine me not putting that cord with my machine or the supplies for it then he headed off to bed and told me we could give searching a try again in the morning. No sooner then he left for bed when the hubby walked through and pretty much said that same thing about his disbelief that my cord would not be with the machine or supplies. At this point I did not want to hear this. I was so grieved and feeling sick about this. I started to head for my computer and thought, well I have checked the china hutch in the dining room three times already, why not try one more time just for the heck of it. I walked in there and up to the cabinet and realized as I looked through the glass doors that in my frenzy I had been checking the lower area behind the solid doors but here in the upper portion behind the glass was a small three drawer chest with my attachments for my machine in it. I though, "Naw, it can't be that simple." "Dare I even hope!?" So I opened the top drawer and out popped my sewing machine cord like a fake snake from a can of peanuts!!!! So let's see here, in search of my sewing machine cord I have found that cord, the missing cord for my CD player and I found a hat I was nearly finished knitting. Well, I think that was pretty good. And I went ahead and finished knitting the hat!

This hat is a double knit hat designed by Nancy Lindberg and it is my very first ever attempt to make a double knit piece. My younger son has adopted it. The colors are not quite the masculine shades of blue I had called in to request from my local yarn shop which were picked up for me by my loving husband while I was laid up in bed for 6 weeks with a broken foot. My son does not mind the light colors and says it is soft and comfortable which is all he cares about.

Time for an overdue update

I really should update this blog more often. Life gets a bit crazy around here at times. A few years ago the hubby and I entered what can best be described as the medical years of our marriage. Between the two of us we have been pretty efficient at providing the local doctors with nice healthy incomes. So with the various sudden medical crises that tend to crop up on us it leaves me little time to give thought to updating this blog. As I raise my right hand, I swear to do better at keeping this updated.

Now when I last posted I was taking a break form my knitting and quilting for a while to work on my counted cross-stitching. I have my long term project that I have worked on and off on for 12 year, the "Fairy Idyll" which is is now very nearly complete. I was hoping to have her done by the end of this year but I have a need to set her aside again until after the new year. This is a bit wrinkled right now but you can see the general idea here. And below the fairy is my progress on a piece I am creating based from my great-grandparents 1899 wedding photo. I used a software program to create the chart for it. I need to do some work to fix one of the great-grandfather's ears but this too will have to wait until spring for me to get back to it. The colors for the great-grands piece do not show up well when I photograph them for some reason. I am sure it is a lighting issue. I will try to get a better photo another time.

It is now winter time which for me means back to knitting and hopefully quilting. I was working on quilting that "Shoo-fly" quilt a while back but ran into a disaster. While I sat in a chair hand-quilting in a hoop, I had large portions of the quilt draped over the side and on the floor. Without me realizing it, the dog was sitting down there and he chewed some holes into the the top layer of the quilt! I will be able to repair it but I have to wait until I am able to do so in a calmer frame of mind. I get mad all over again every time I see that quilt! So for now I am keeping it tucked safely away.


Thursday, May 28, 2009

Retireing from knitting and quilting for a while

What, retire you say, how does one retire from these hobbies and still feed their creativeness? Simple switch hobbies. ROFL! I am actually not trying anything new. I am just picking up on an old hobbie I used to love but abandoned some years back. I am returning to counted cross-stitching. I actually used to design charts of counted cross-stitch and hand painted needle point canvases for a local shop in the 1990's but that work took over so much that I rarely had time to actually sit down and stitch anything for myself. There are times when I do actually miss designing and selling but then I think of all those long hours I spent at it and think meh, I would rather design and stitch for myself. There are so many designers on the market as it is. I even have a few favorite designers. Theresa Wentzler and Nora Corbett both have outstanding designs and are particular favorites of mine. I am still working on the Fairy Idyll design Nora Corbet created for Mirabelia more then a dozen years ago. In fact I am posting my progress here. This is the main project I am trying to complete at the moment. The beadwork in this design is down right gorgeous. I am also working on a special project. I took my great grandparents wedding photo from 1899 and imported it into PC Stitcher and created a nice cross - stitching chart with it. I can hardly wait to get this made. I am hoping it will turn into quite the masterpiece and an heirloom to be passed down.


Above is Nora Corbett's Fair Idyll design in progress.

And below is my great grandparents wedding photos also in progress.