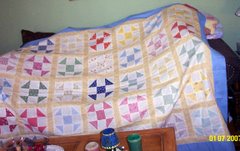
About a week ago I began a crazy search online for a very old granny square block pattern with nothing but an old black and white photo from the later 1940's to base my search on. Well that, and visual memory of of an afghan I have not seen in 1989. It was an afghan that had been in my husbands family for many, many years and has traveled off to another line in the family. Such is life. I wanted to try and reproduce the afghan design but try as I might, I have not been able to find the exact pattern anywhere though there are many internet friends out there keeping a keen eye out for me. In the meantime I decided to try and reproduce the design myself but again, with only the black and while image to go by, this became a futile task. Or so I thought. While I did not reproduce that beautiful design that I sought after, I instead created my own design that came about quite nice accidentally so to re-coin the saying of the late painter Bob Ross, I am calling this design "The Happy Accident." I hope you find it to be as pleasing of a design as I have and I am including my directions below with photos, many, many out of focus bad photography photos but hoping they can help in some way. It was quite hard to take the photos one handed while holding the work with the other hand, lol. One of these days I will re-shoot them when I can get one of my guys to sit by me for an afternoon and patiently take the photos for me, lol.
"The Happy Accident" block
Supplies:
For an 8.75 inch block Size "H" hook. (I did try one with a size "K" and it was much looser and came to be a perfect size 10 inch block I tried "I" as well and ended up with same size as the "H" but didn't look as nice.)
6 different colors of size medium worsted weight yarn. I used Red Heart Super Saver acrylic yarn.
My colors in order were: 1. lt. purple 2. red 3. green 4. dk. yellow 5 purple and 6 black
1 yarn needle and scissors.
Update: About a week or two ago I decided to play around with hook sizes and I found that using a size "F" hook produced a perfect size 7 inch square.
Abbreviations:
Slip Stitch SS
Single Crochet SC
Half Double Crochet HDC
Double Crochet DC
Treble Crochet TR
Yarn Over YO
Beginning and ending repeat symbols used: * # %
You will be working in color rounds in this pattern.
1. Beginning with lt. purple, chain 4 and join with a SS.
Chain 1 and work 7 SC. Join through the 1st SC with a SS.
Work beginning puff stitch as follows: Chain 3, YO and work through same SC as the SS join and base of chain 3. Hook yarn and pull through the SC. You now have 3 loops on hook. Hook the yarn and draw through all three loops. Chain 1 to secure beginning puff stitch. Chain 1 once more. See photo below.
YO and work through the next SC. 3 loops on hook. YO again and work through the same SC. 5 loops on hook. Hook yarn and draw through all 5 loops. Chain 1 to secure puff stitch. PUFF STITCH made.
Chain 2 (this will form corner) See photo below. PLEASE NOTE: TYPO IN PHOTO SHOULD READ THROUGH ALL 5 LOOPS ON HOOK!
*Work puff stitch through the next SC. Chain 1. Work puff stitch through next SC. Chain 2. Repeat from * 2 more times and join to top of chain 3 of beginning puff stitch with a SS. Fasten off and use yarn needle to work loose ends in. Your piece should look like photos below.
Update: Note, an alternative method to get thicker puff stitch is to be more traditional and continue adding more yarn overs until you have made 5 yarn overs and have 11 loops on the hook. Draw through all of them.
2. Next color Red.
Attach red in any chain 2 space and chain 3. This chain 3 counts as Beginning DC. Work a DC through the chain 2 space and chain 1. Work TR, chain 1, TR, Chain 1, and 2 dc. Chain 2. In next corner work *2DC, chain1, TR, chain1, TR, chain 1, 2DC, chain 2. Repeat from * 2 times more. Join the last chain 2 into top of the Beginning DC with a SS and fasten off. Work ends in. See photo below of finished round.
3. Attach next color, green, in any chain 2 space. Chain 1(counts as beginning SC).
I hope I can explain this next part well enough for you. You will now reach down to work a DC through the chain 1 space of the Lt. purple puff stitch round 1. You are working over the red and lt. purple chains encasing them. Study my photos below for visual aid.
Work a 2nd DC in same way. Work 1 SC through the red chain 2 space only. Study photos below.
*Chain 1, work 3DC in next chain 1 space, chain 1. Work 1DC, chain1, 1DC in the chain 1 space between the TR of red round. Chain 1, work 3DC in next chain 1 space. # Chain 1, work SC in next red chain 2 space. Reach down to Lt. purple chain 1 space and work 2DC as you did prior. Work 1SC through the red chain 2 space. % Your piece should resemble the back and front photos below.
 | ||||
Repeat from * to % 2 times and from * to # once. Chain 1 and join with a SS. Fasten off and work ends in.
Your piece should look like the photos below.
4. Attach dk. yellow through chain 1 space between a SC and 3DC as in photo below.
Repeat from * to % 2 times and from * to # once. Chain 2 and join with a SS to top of Beginning chain 3. Fasten off and work in ends.
You finished round should look like photo below.
5. Attach purple at chain 2 space on side of the block. Chain 1 (counts as 1 SC) Work 2DC over the dk. yellow and into the tops of the 2 DC of the green round. (same method as you worked the green over the red and lt purple in round 3) Work 1SC over the dk. yellow chain 2 space. Work SC across to corner chain 1 space. Work 3SC in corner. See photos below.
Sc across to chain 2 space. 1SC over dk. yellow chain 2 space, 2DC over dk. yellow and into the 2DC of green round below. Work 1SC over dk. yellow chain 2 space. SC across to corner and work 3SC in corner chain 1 space. Continue in this way around and join to beginning chain 1 with a SS. Fasten off and work in ends.
6. Attach last color black in any corner. Chain 1 and 2SC in corner. *5SC across, 2HDC, 4DC, 2HDC, 5SC to corner % 3SC in corner. #
Repeat from * to # 2 times and from * to % 1 time. Join with a SS. Chain 1, 2SC in corner, SC across to next corner. 3SC in the corner. Repeat around and join with a SS to beginning chain 1. Fasten off. Work in loose ends. Block is finished.
©Copyright 2010 Andrea C. Heslin


